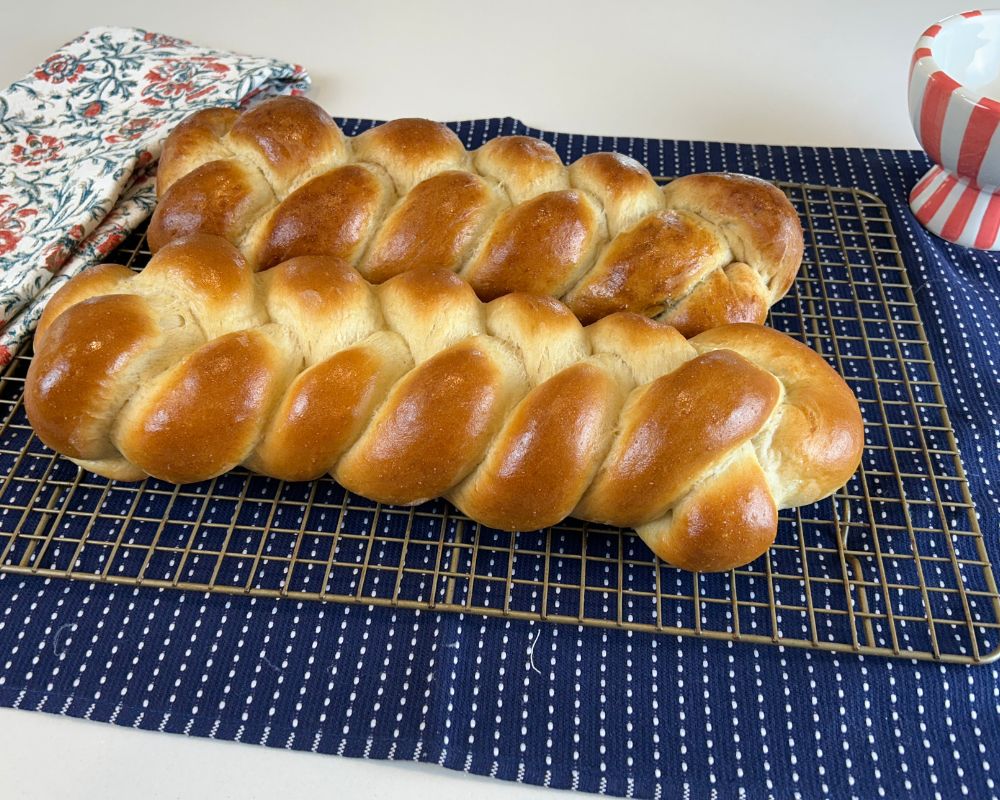
Homemade Challah
Have you ever baked bread from scratch?
If you want fresh bread and a house that smells delicious, homemade challah will fill your home with the scent of fresh, warm bread. I have baked with my mom and grandmas my entire life, but about ten years ago I got more serious about bread baking. My personal mission is to master sourdough, baguettes, ciabatta, and challah. I hope you enjoy this recipe as much as my family does.
Challah is a Jewish, enriched bread often made for ceremonial occasions. It is easy to make and has a wonderful, soft, pillowy interior. I love it sliced and toasted with butter, or made into French toast…let’s be honest, I always want French toast.
Get Ready to Bake
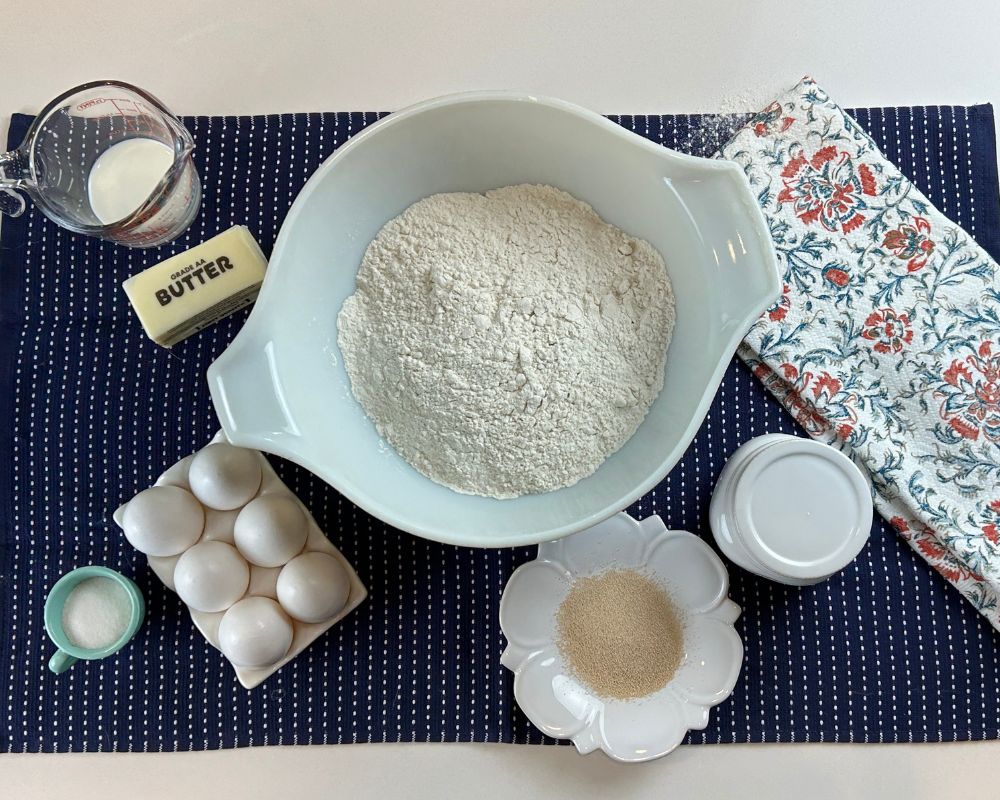
Everything measured and ready to go. 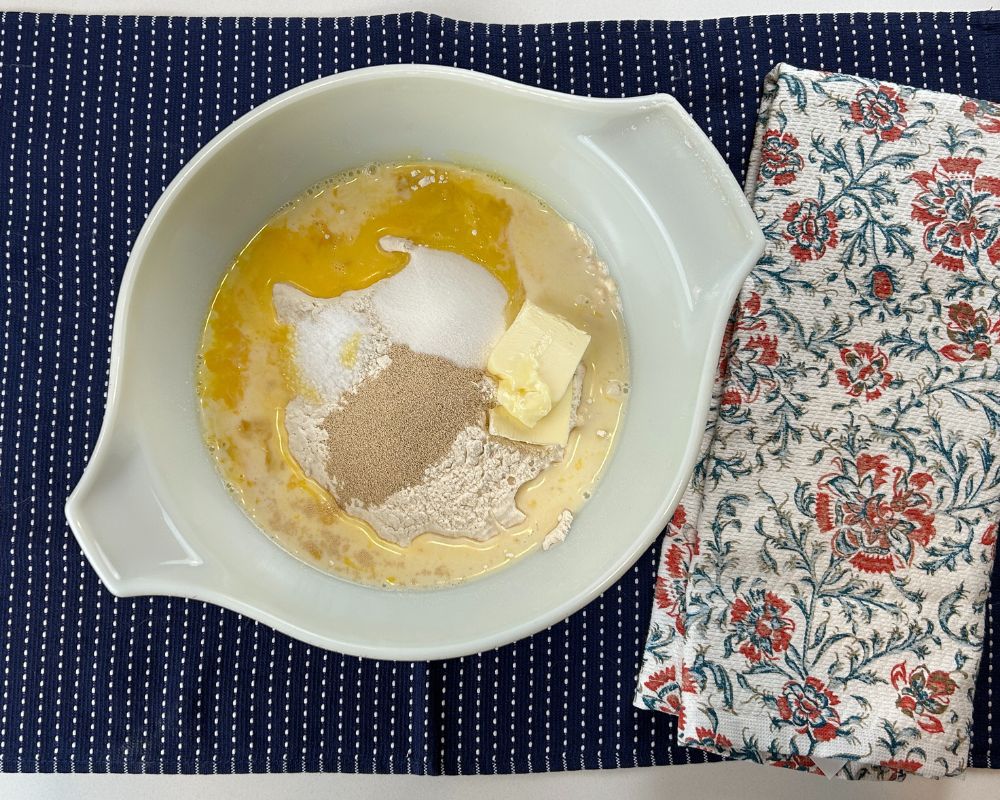
Ingredients combined before mixing 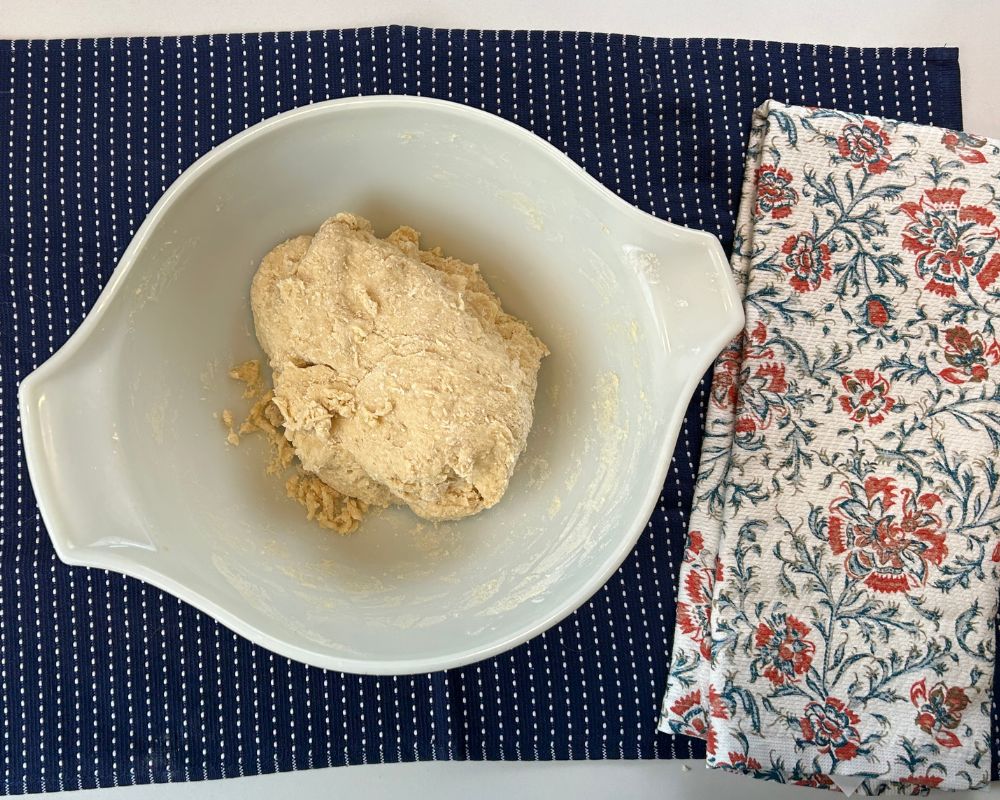
The dough will look rough before it comes together.
When baking bread, you will find that a few simple ingredients combined in the correct proportions are all you need. Flour, water, yeast, and salt will make you a simple bread. Add a few key ingredients and you will have a fantastic loaf of bread. Homemade challah is a dough enriched with milk, eggs, and sugar that makes this bread rich and flavorful.
Bake Using Metric Measurements
I strongly recommend getting a good-quality scale and transitioning to metric measurements for baking. Using imperial measurements is okay, but you won’t get the same accuracy. Baking is basically chemistry and accuracy guarantees more consistent results.
I use a digital kitchen scale that I got years ago. It has a removable bowl that is handy for measuring multiple ingredients and is super easy to operate. You can find it here.
This recipe is from one of my favorite cookbooks, How to Bake by Paul Hollywood. I adore this book and use it constantly for bread and baking techniques. You can find the book here.
Knead and Knead Some More
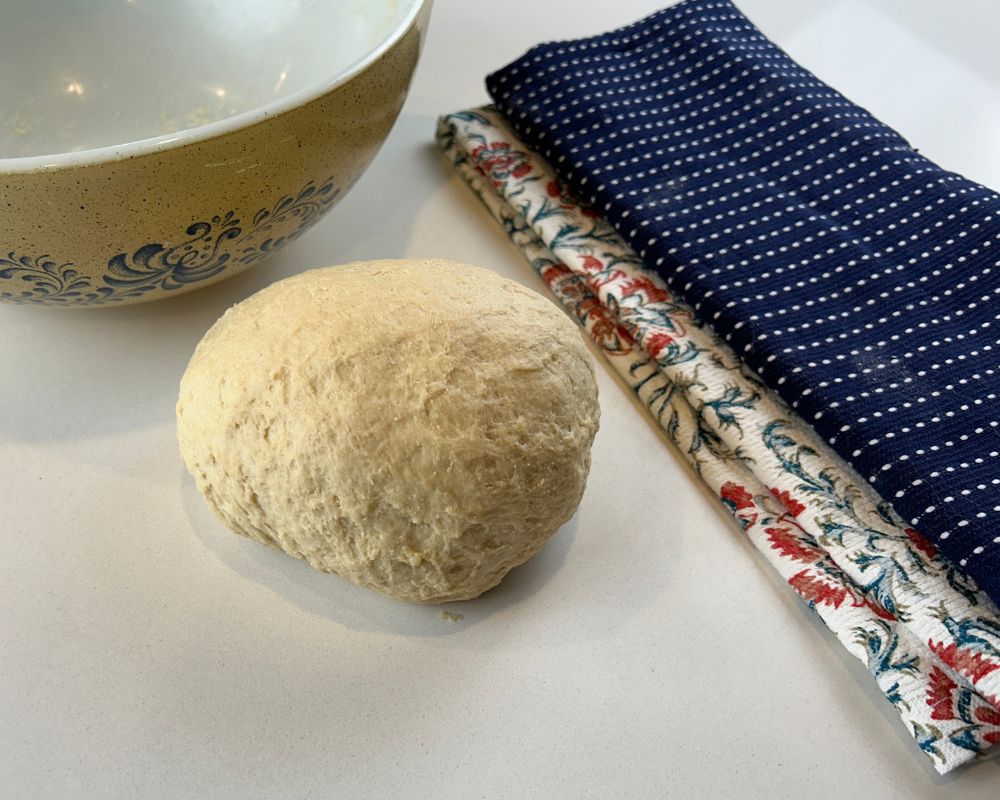
Dough before kneading, rough and sticky. 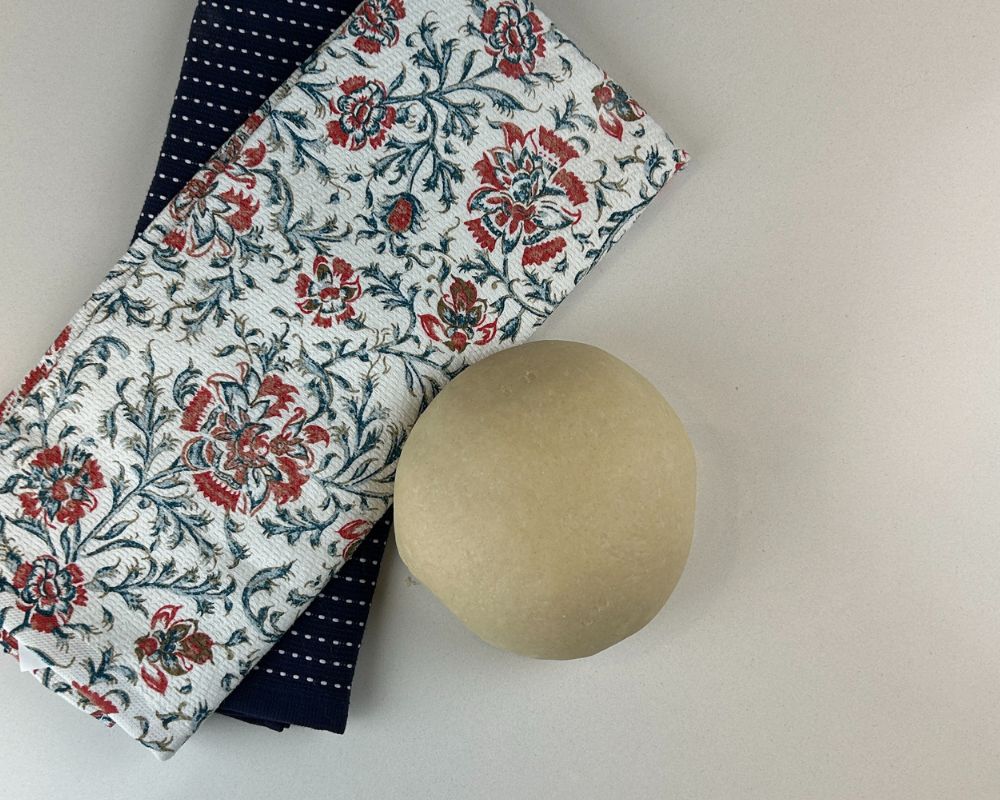
Fully kneaded dough, smooth and elastic.
Transfer the dough to a lightly floured work surface and knead for 5-10 minutes until the dough is smooth and elastic.
Kneading Technique
There are several kneading styles but my preferred method is to fold the top of the dough over toward you to the bottom and then use the heel of my hand to press the folded dough flat again. Repeat the process for forever and a day. Just kidding! If you knead firmly, the process should go fairly quickly (6-10 minutes) and it’s a good arm workout.
Bonus Tip!
If your dough feels too dense to knead easily, you can cover it with a tea towel and rest it for five minutes. The kneading will be much easier after the gluten relaxes a little.
First Proof
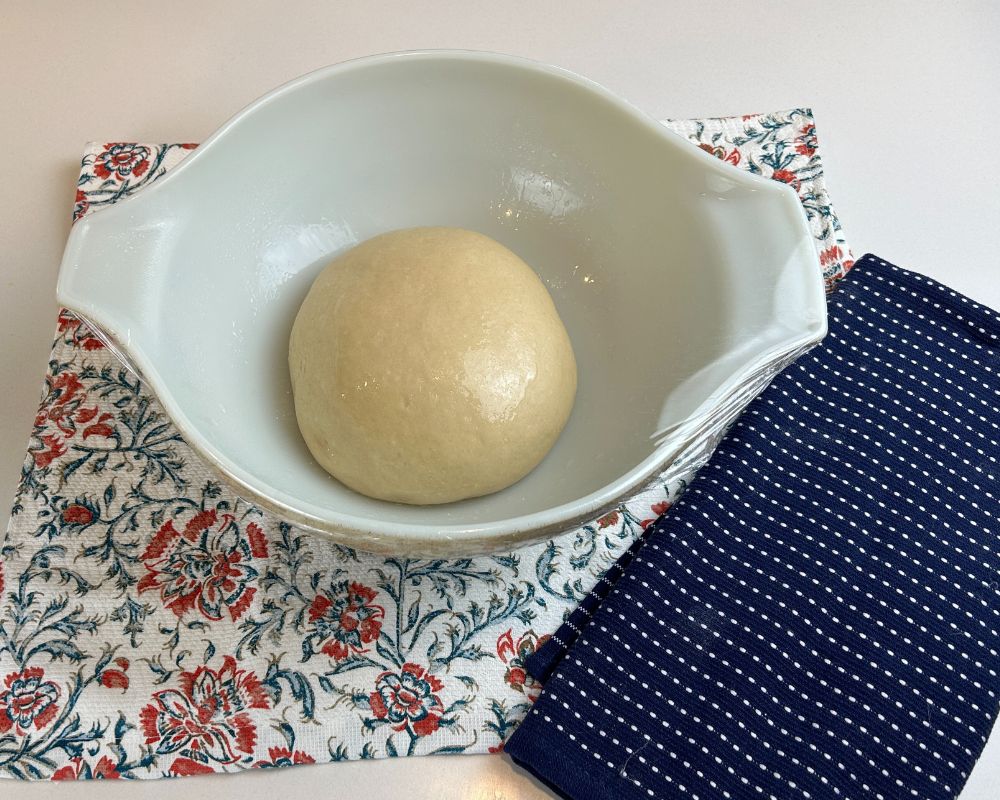
Dough lightly coated in oil before first proof. 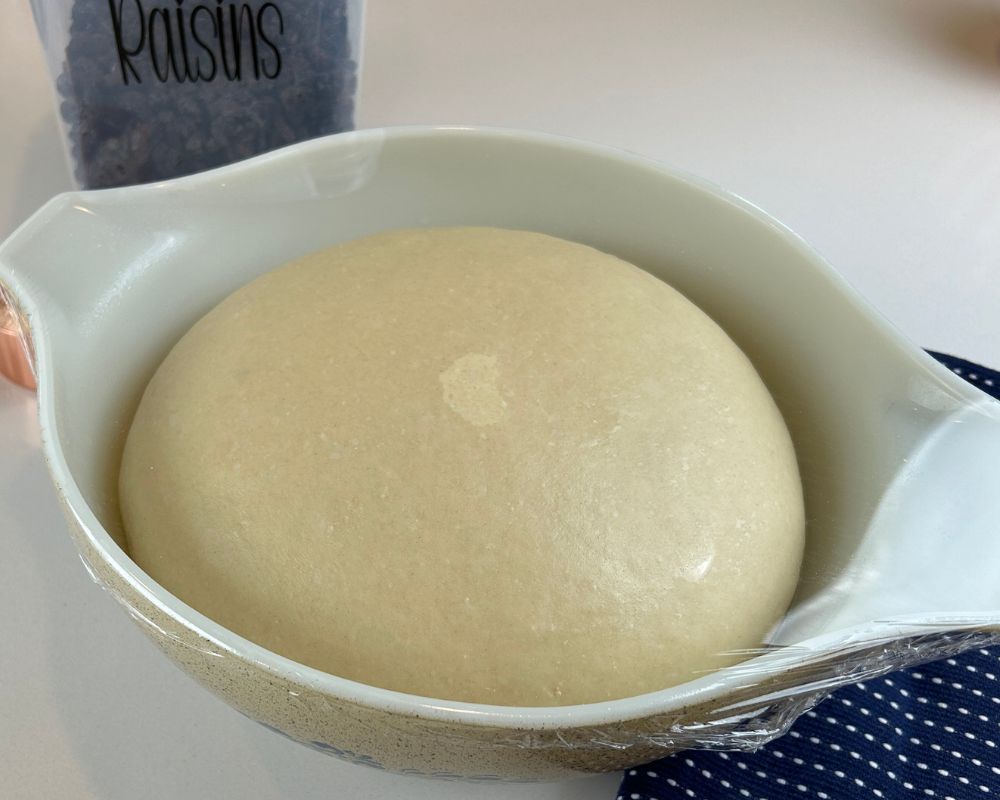
Dough after first proof, doubled in size. 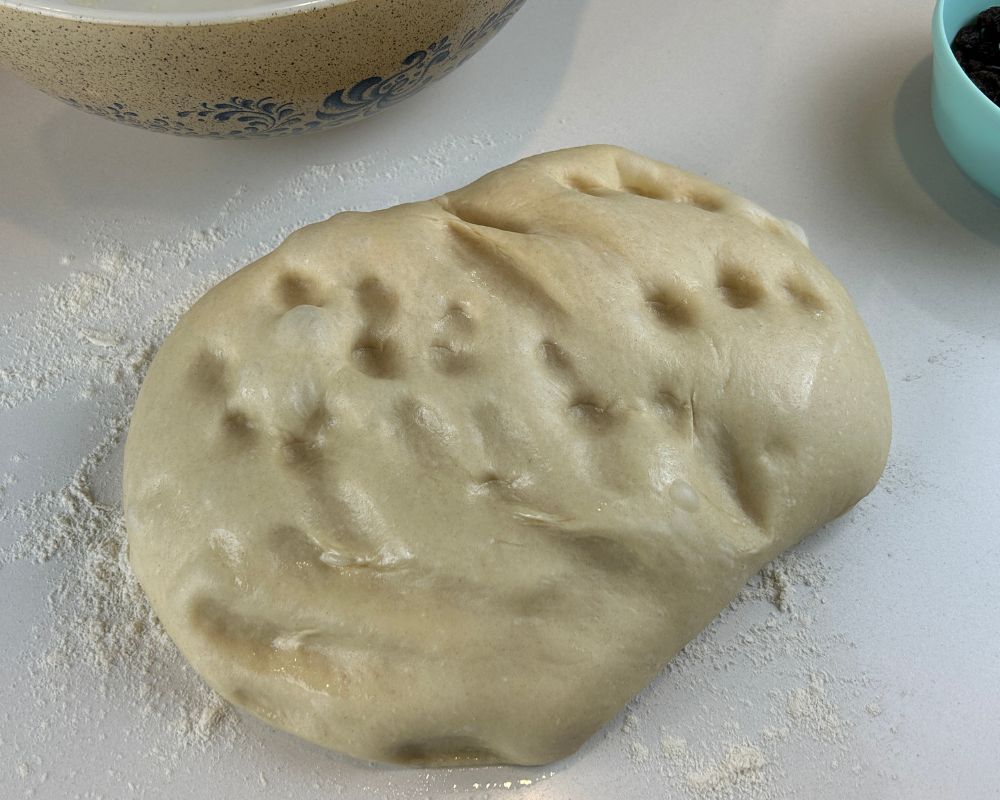
Dough knocked down and ready to shape.
Lightly coat a large bowl with a neutral oil and add kneaded dough, turning once to coat.
Cover the bowl with plastic wrap and set it to proof in a draft-free area for at least 1 hour or up to 2-3 hours. The dough should double in size.
Knock Down Dough
Once the dough has doubled in size, transfer it to a lightly floured surface and knock it down. This just means releasing the air. Press the dough down, then fold it over itself a few times to form a ball again.
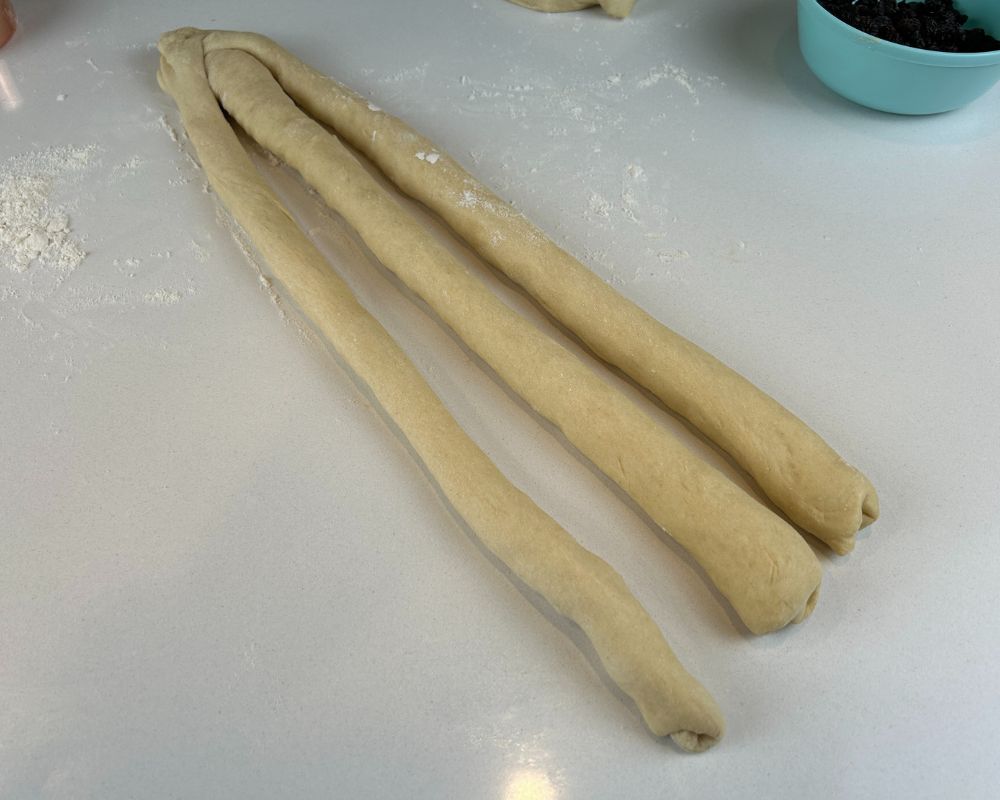
Portion the Dough
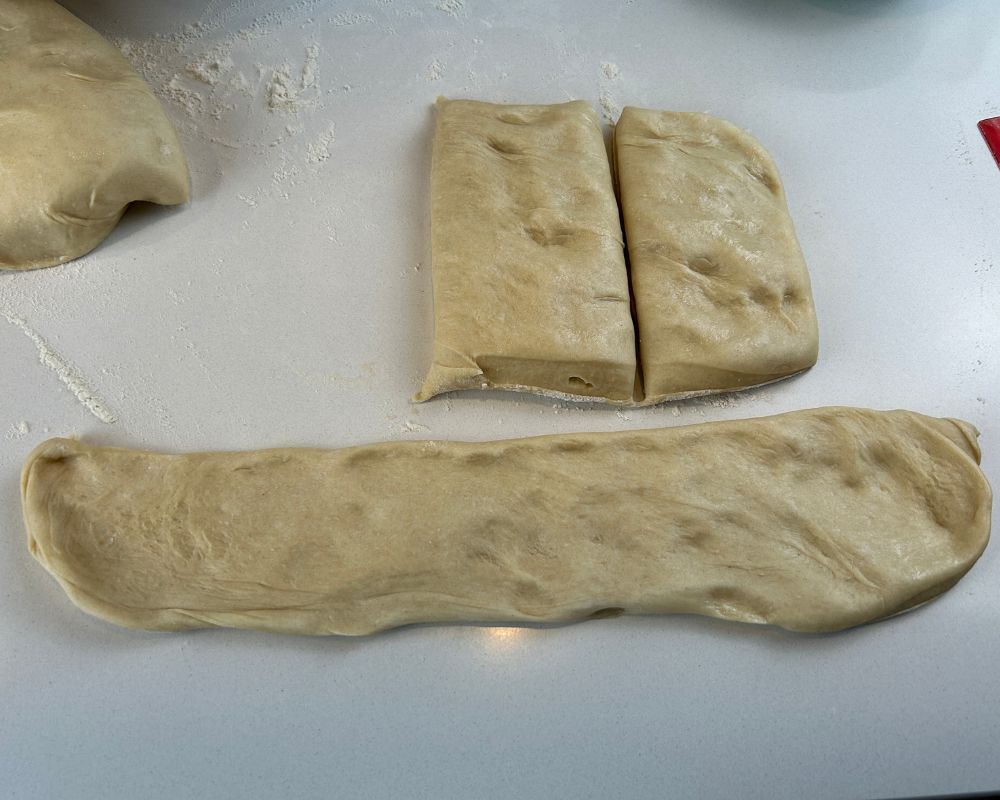
Flatten dough out. 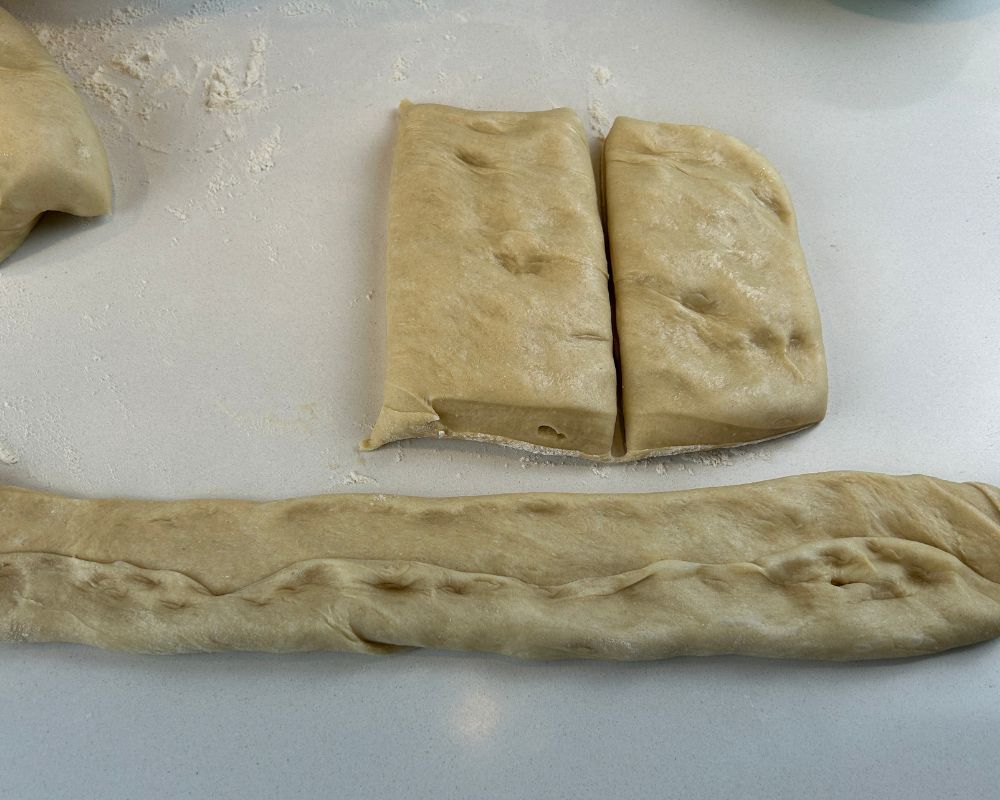
Roll dough into a rope starting at the bottom longside. 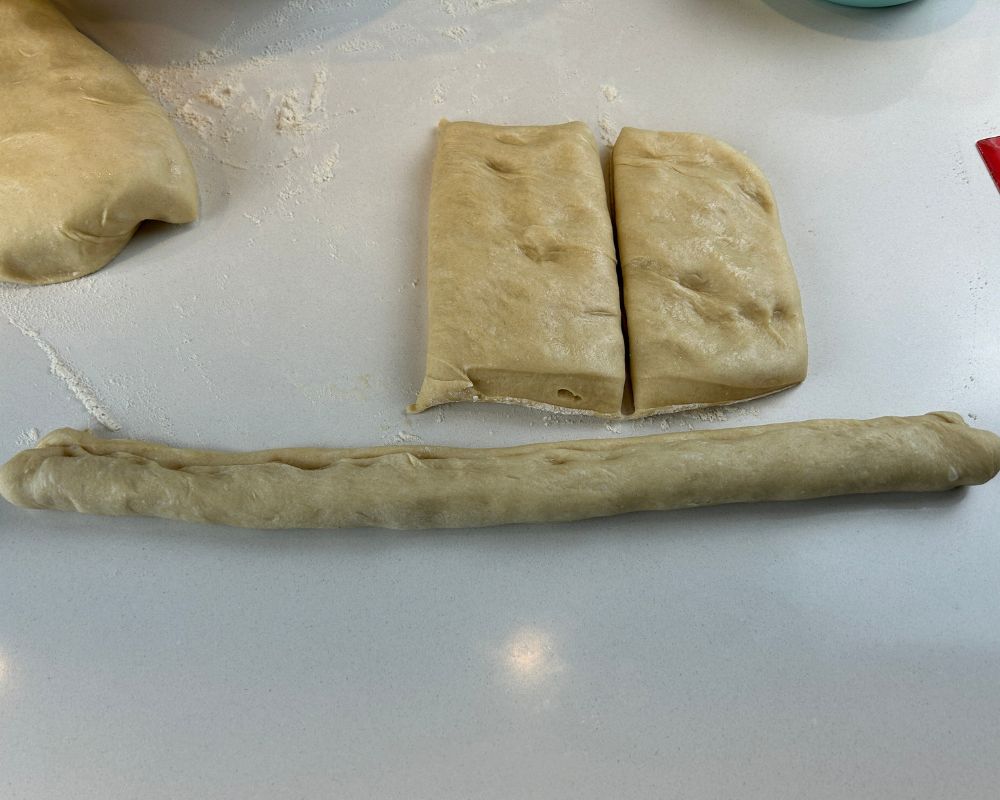
Pinch seam to close rope.
I am making two braids here, so I am splitting the dough in half, then divide each half into three. Just split the dough into three if you want one large braid.
Shaping and Braiding
Even ropes pinched at one end ready for braiding. 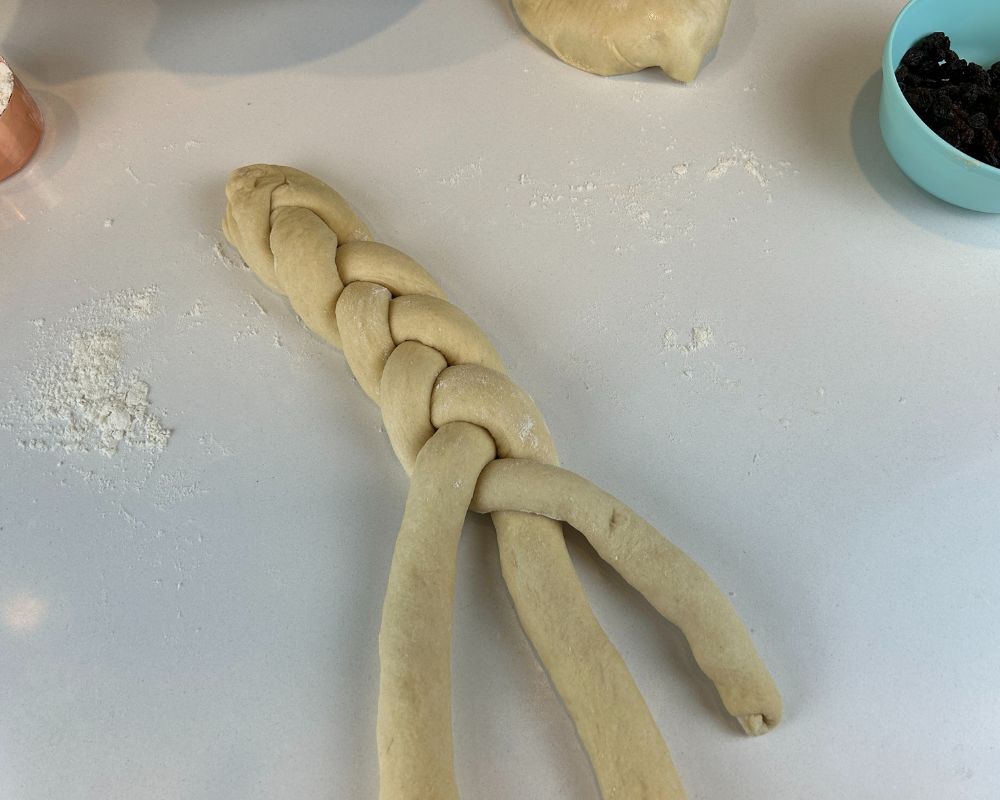
Braiding process. 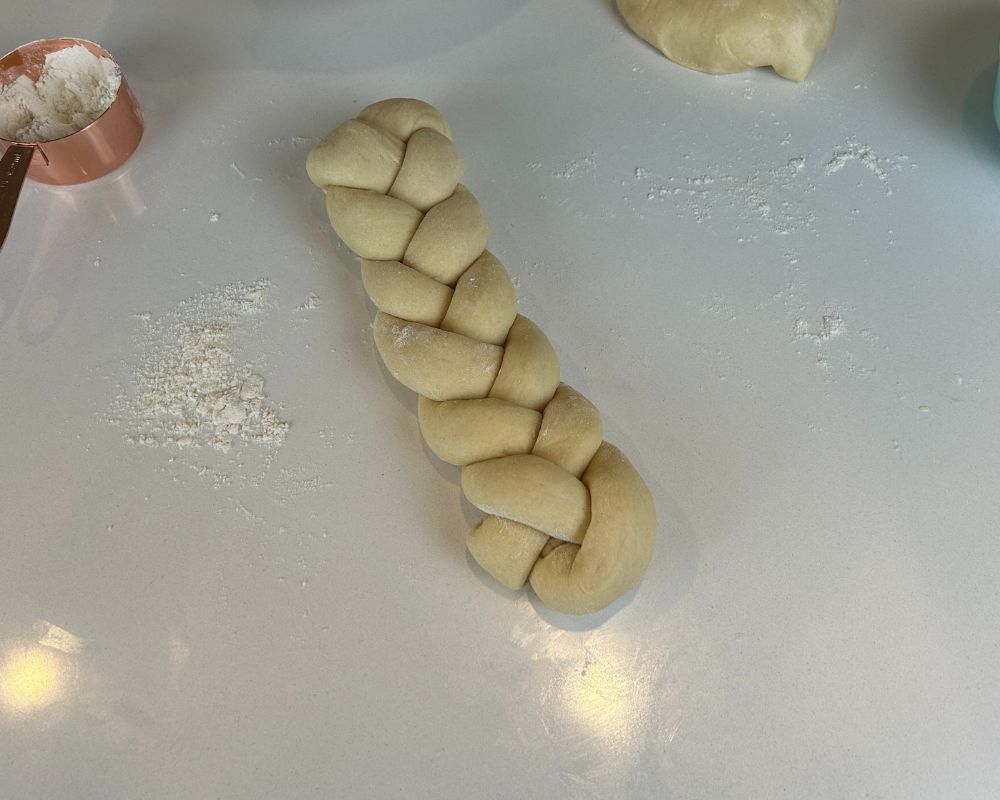
Fully braided challah.
Roll each piece of dough into a rope to make one strand for the braid. Repeat with the remaining two pieces, keeping them all the same length.
Join the pieces at one end and begin the braiding process.
Pass one outside strand over the center strand, then repeat from the other side and continue until the braid is complete.
Transfer the completed braid to a parchment-lined baking sheet while you complete the second braid if making two.
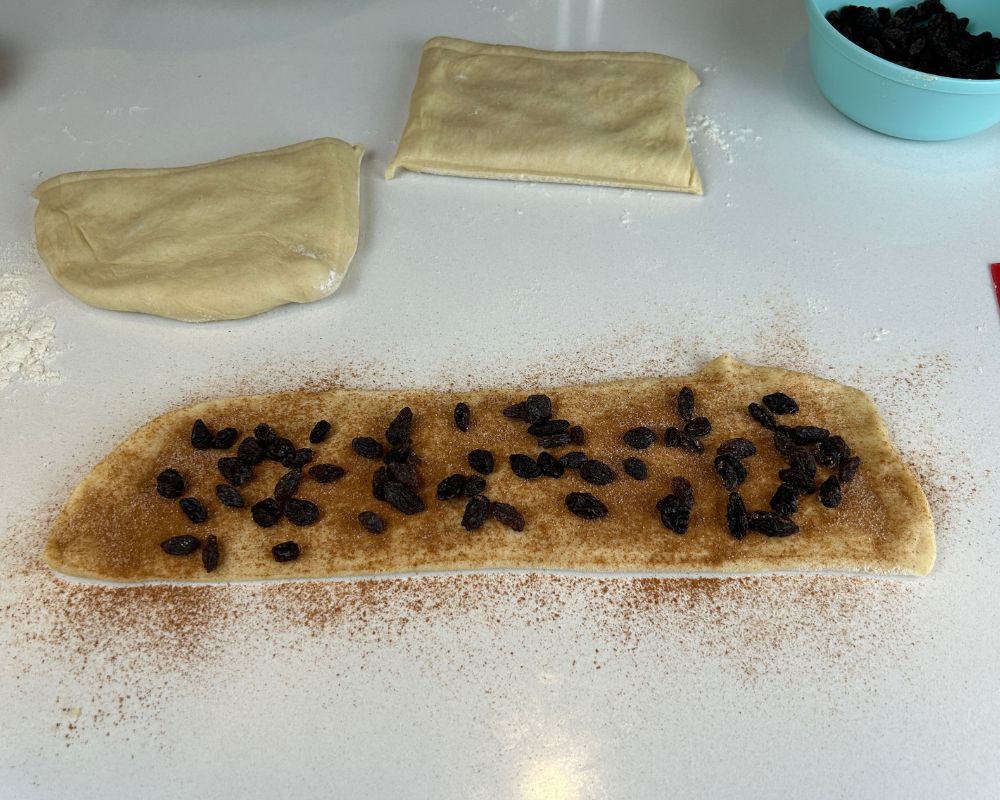
Cinnamon Raisin Challah Alternative
Adding cinnamon sugar and raisins. 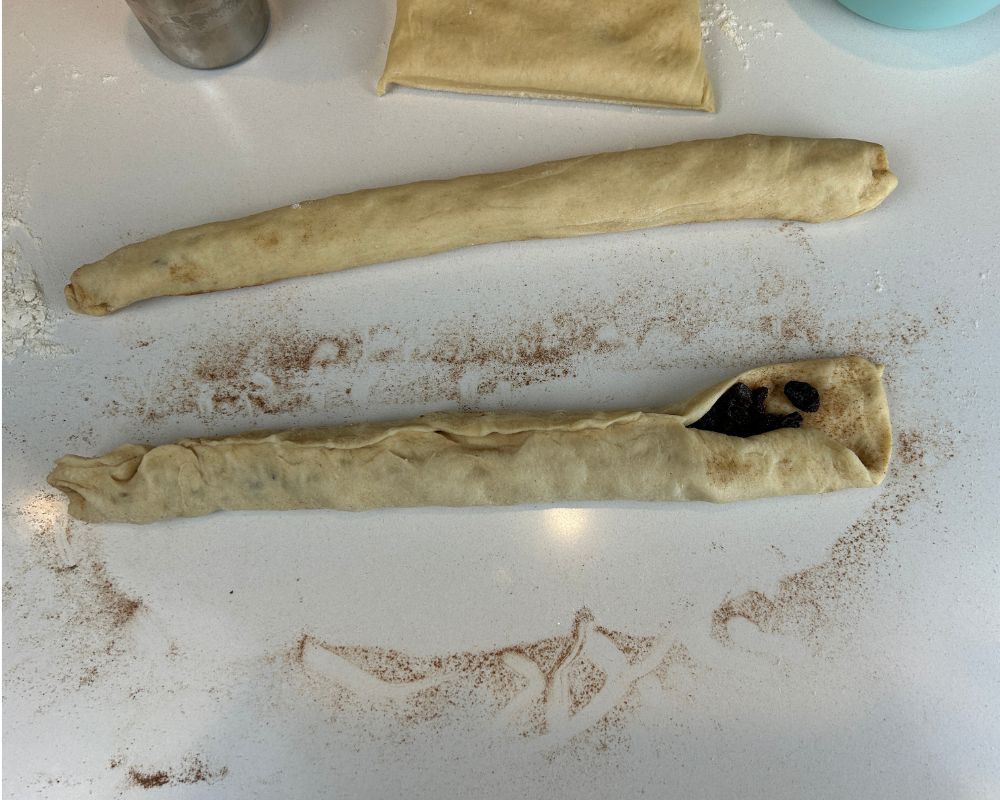
Rolling filled strands. 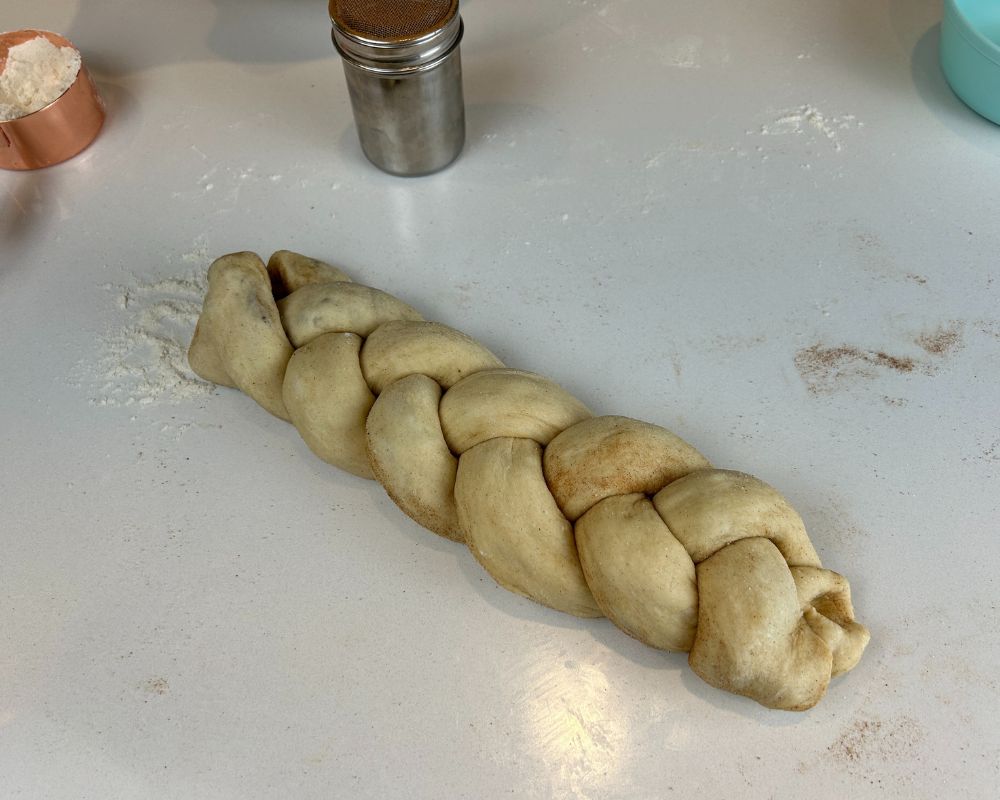
Finished cinnamon raisin challah.
I love to add cinnamon and raisins to my challah and use it for French toast or sliced with butter. There are many ways to make this addition, but this is how I do it.
When shaping strands for the braid, make the rope, then flatten it out. Cover with a mixture of cinnamon and granulated sugar, then raisins. Roll the strand up lengthwise: fold over one-third and press, then fold again to seal it closed. Pinch the seam together to seal and gently roll until smooth. Complete the braid as you did on the first braid.
Final Proof
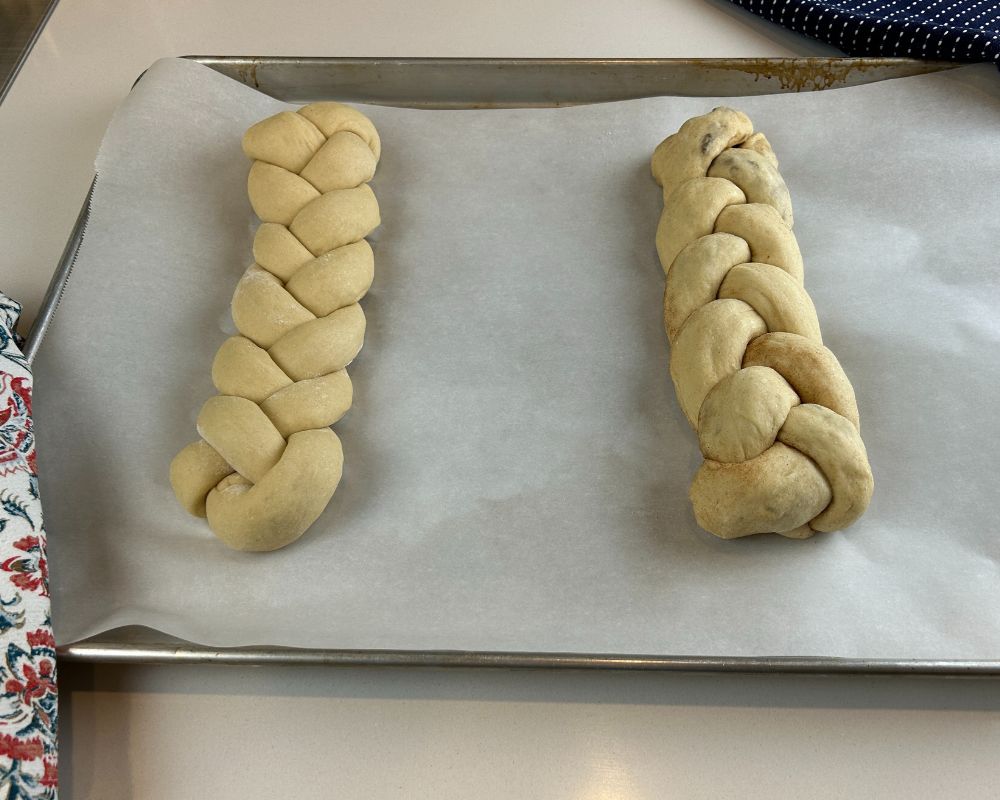
Braids before final proof. 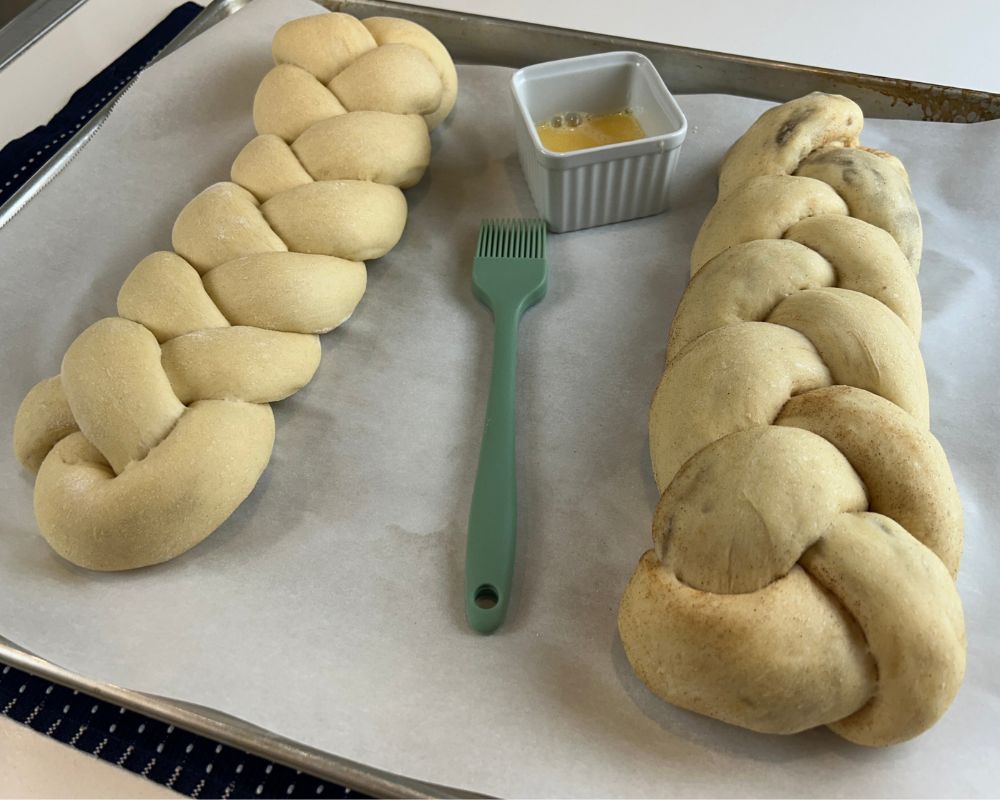
Braids fully proofed and ready to bake.
Transfer braids to a parchment-lined baking sheet. Cover loosely with a plastic bag or tea towel and allow to proof for one hour.
Bake Time
Twenty minutes before final proof is complete, preheat your oven to 425 F.
Egg Wash

The final proof is complete when you gently press the dough and it springs back slowly. Then you’re ready to bake.
Beat one egg with a teaspoon of water and brush gently onto proofed braids.
Bake
I always keep an oven temperature gauge in my oven, ovens are rarely accurate so it is always good to double-check.
Place the baking sheet in the oven and bake for 20-25 minutes or until the braids are golden brown and sound hollow when knocked on the bottom.
Allow homemade challah to cool for an hour before slicing.

I love using homemade challah for my Cinnamon Raisin Challah French toast, topped with butter and toasted pecans.
Slice challah and arrange the slices in a zip-top bag, then toss them in the freezer. You can grab a few slices and make French toast for yourself anytime.
Enjoy!